
Imagine if one single key unlocked your house, your car, your office, and even your safety deposit box at the bank. Convenient? Sure. Safe? Absolutely not. If you were to lose that key—or if someone were to steal it—they would instantly have access to everything important in your life. That’s exactly what happens when you reuse the same password across multiple accounts. The Convenience Trap It’s easy to see why people reuse passwords. With dozens of logins for banking, shopping, email, … [Read more...]
August 19, 2025 By Computer Techs
August 19, 2025 By Computer Techs
Check the Source to Help Stop Phishing and Scams

In today’s digital world, phishing and online scams remain some of the most common ways criminals trick people into giving up sensitive information. These attacks often look convincing—emails that appear to be from your bank, websites that resemble popular retailers, or texts that mimic delivery services. However, most phishing attempts can be uncovered with a simple habit: checking the source email address or website before taking action. Why Source Details Matter Scammers rely on urgency … [Read more...]
July 21, 2025 By Computer Techs
What You Need to Know About Backup and Cloud Storage – And How to Avoid Recent Scams
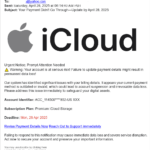
In today’s digital world, the importance of backing up your data cannot be overstated. Whether it's precious family photos, important documents, notes, contacts, or your calendar/reminders, losing data can be devastating. Cloud storage has become one of the most popular and convenient ways to ensure that your files are safe, accessible, and recoverable in case of loss. However, as the use of cloud services has grown, so too has the number of scams targeting unsuspecting users. Understanding … [Read more...]
July 21, 2025 By Computer Techs
Why Senior Citizens Shouldn’t Be Afraid of AI – How It’s Used in Their Everyday Lives

Artificial Intelligence, or AI, is becoming a part of everyday life—but for many senior citizens, it still feels like something to fear. Negative headlines, privacy concerns, and the mystery of how it all works can be intimidating. However, the truth is that AI is already helping seniors in simple, supportive ways—often without them even realizing it. From health reminders and voice assistants to easier Google searches and improved home safety, AI is designed to enhance independence, not take … [Read more...]
June 24, 2025 By Computer Techs
A Beginner’s Guide to Passkeys: How to Set Them Up, Use Them, and Sync Across Devices

Updated 6/10/26 - clarified platform and browser support: If you’re tired of remembering complex passwords or worrying about phishing attacks, passkeys offer a simpler, safer alternative. Major platforms like Google, Microsoft, Apple and Yahoo now support passkeys, and they’re designed to replace passwords entirely. In this guide, we’ll explain what passkeys are, how to set them up, and how you can use them across multiple devices—even for the same account. A passkey is a modern, more … [Read more...]
June 24, 2025 By Computer Techs
The Anxiety of Data Breaches and Dark Web PII Exposure: What You Can and Cannot Do

In today’s digital world, data breaches are no longer rare events—they are a near-constant threat. From social media platforms to healthcare providers to internet service providers, major organizations have seen their systems compromised, often resulting in personally identifiable information (PII), being leaked onto the dark web. Understandably, this has created a new wave of anxiety for individuals—many of whom have no idea their data has been exposed until it’s too late. But while the fear … [Read more...]
April 22, 2025 By Computer Techs
Why Retirees Are Targets for Identity Theft or Credit Fraud

When people retire, it’s easy to assume that certain financial concerns fade away—especially the fear of identity theft or credit fraud. After all, if you're no longer applying for loans or opening new credit cards, why would anyone want to target your credit file? In reality, seniors remain prime targets for identity thieves, and freezing your credit can be one of the simplest and most effective ways to guard against potential financial harm. Here’s why even retirees should seriously … [Read more...]
April 3, 2025 By Computer Techs
Need a new printer? Why you should consider getting laser/LED vs. inkjet

When purchasing a new printer, there are several reasons you should consider getting laser vs. inkjet. We are often asked to troubleshoot printing problems with inkjet printers. With Nevada's dry climate, if you don't frequently print something the ink in inkjet printers often dries out and clogs the ink cartridges and print heads, thus reducing print quality or completely rendering the printer useless. When shopping for a printer you may be inclined to get an inexpensive printer because … [Read more...]
March 19, 2025 By Computer Techs
Having problems with a website? Try these tips.

That moment of frustration when a website refuses to cooperate is all too familiar. Whether it's a slow loading page, a broken link, or a complete inability to connect, website problems can throw a wrench in your productivity or simply be a major annoyance. But before you throw your hands up in despair, take a deep breath and try these simple yet effective troubleshooting tips. You might be surprised at how often the solution is quick and easy. Try an alternative web browser Most … [Read more...]
March 18, 2025 By Computer Techs
Can your data really be taken off the dark web?

While no service can guarantee the complete and permanent removal of your data from the dark web, some services can reduce your exposure. Here's a breakdown of what they can and cannot do: What Dark Web Monitoring Services Can Do: Monitor: These services continuously scan known dark web marketplaces, forums, and other hidden areas for your personal information. This includes things like: Email addresses Passwords Social Security numbers Credit card numbers Bank account … [Read more...]