Computer / Internet Tips & News – exclusively for Computer Techs clients
Support for Windows | macOS | iOS | Android
Welcome to the Computer Techs Computer / Internet Tips & News blog. This purpose of this site is meant to provide a service to our valued customers, by keeping you informed with the latest news and tips related to your computer and the internet. Consider using the search box on the left side of the website to help you find a specific topic or article, or scroll through articles below to learn something new.
Get $25 Off your next service call for recommending Computer Techs
If you’re happy with our service, please consider recommending Computer Techs to a friend or relative. If we service their computer, you get $25 Off your next service call.
The details: Please have your friend or relative mention your name during the appointment, or after the appointment contact Mark Cobb with the name of the person that you recommended/referred. The referred person must be a new Computer Techs customer and not reside in the same household as the referrer.
Smart assistants are all the rage these days, with everyone from Amazon to Apple to Google getting in on the action. But what are they, really?
In a nutshell, smart speakers are voice-controlled assistants that can perform tasks, answer questions, play music, and control smart devices in your home. But, before you can start issuing commands to your new device, you need to set it up.
This can seem like a daunting task, but we’re here to help. In this article, we’ll walk you through the process of setting up and configuring your new smart speaker, as well as some tips on how to get the most out of it.
You’re about to enter a world of hands-free convenience and voice-activated fun.
Things You’ll Need
To set up your new smart speaker, you’ll need the following:
The smart speaker itself
A mobile device – such as a smartphone or tablet
A Wi-Fi connection
Setting Up Your Smart Speaker
While there are plenty of options available in the smart speaker market, the three most popular options are the Amazon Echo, the Google Home, and the Apple HomePod. The process of setting up your speaker will vary a bit depending on which one you’ve chosen, but generally, it involves downloading an app and following the instructions.
It really is that simple.
The steps to get your new smart speaker up and running will usually look something like this:
Download the mobile app for your smart speaker. This is essential for initial setup and for configuring many of the speaker’s features.
Open the app and create an account. Many manufacturers require you to create an account with them before setting up your device. This makes it easy to manage multiple devices as well as access your devices from outside your network.
Follow the instructions on the app to complete the setup process. This will generally involve things like connecting your mobile device to the smart speaker so it can connect it to your Wi-Fi network as well as giving your new assistant a name.
Start exploring! Once your speaker is set up, you can start issuing commands and asking questions.
Be sure to explore the app to learn about all the different things your smart speaker can do.
Tips for Getting the Most Out of Your Smart Speaker
Now that you’ve got your smart speaker up and running, it’s time to start putting it to use. Here are a few tips to help you get the most out of your new voice-controlled assistant:
Take advantage of hands-free convenience. One of the best things about smart speakers is that they allow you to accomplish tasks without ever having to lift a finger. In addition to being able to control smart devices in your home, many smart speakers also have built-in voice control features that allow you to do things like set timers, add items to your shopping list, and check the weather. So, take advantage of that hands-free convenience and use your voice to control as many things as possible.
Don’t be afraid to experiment. The best way to learn what your smart speaker is capable of is to experiment with it. So, start issuing commands and asking questions and see what happens. You might be surprised at just how much your smart speaker can do.
Keep your speaker updated. Like all devices, smart speakers need to be kept up-to-date with the latest software to function properly. Most manufacturers make it easy to check for and install updates right from the mobile app.
Make sure everyone in your household is on the same page. It can be helpful to sit down with everyone in your home and agree on a few basic rules for using the smart speaker. For example, you might want to establish that only one person can talk to the speaker at a time or that the speaker should only be used for certain tasks.
Don’t forget to pause when “waking up” your device. Every device has a trigger word or phrase – such as “Echo” or “Hey Google”. Don’t forget to pause for a second after speaking the trigger so that your speaker has time to wake up and start listening for your command. Most devices have a light that will illuminate or change color when it’s ready to listen to you.
Start Enjoying the Convenience of a Smart Speaker
By taking the time to set up your smart speaker and getting familiar with its features, you’ll be well on your way to enjoying all the convenience and fun it has to offer. They are a great way to add convenience and fun to any home. Every day, these devices are becoming more and more advanced, so it’s worth taking the time to set one up in your home.
If you have any other questions orneed helpwith your smart speaker don’t hesitate tocontact us!
Have you ever wondered how a virtual doctor visit works? With more and more people working remotely and/or juggling a million different commitments, it’s no wonder that virtual doctor visits are becoming increasingly popular. In this article, we’ll take a look at what a virtual doctor visit is, how they work, and some of the pros and cons.
What is a virtual doctor visit?
A virtual doctor visit is a consultation between a patient and a doctor that takes place over video chat (or other electronic avenues). That means you can consult with a doctor from the comfort of your own home – no need to travel to an office. All you need is a computer or smartphone with a webcam and an internet connection.
Make sure you consult with your specific doctor to see what types of appointments they’re able to do virtually. Some appointments might not be able to be done virtually (like a physical exam), but many common appointments – like follow-ups, prescription renewals, and mental health check-ins – can be easily done online.
How do virtual doctor visits work?
Once you’ve found a doctor that you’d like to consult with, you’ll need to book an appointment. How you proceed next will depend on the institution you’ve made the appointment with. However, it’s common that once the appointment is booked, you’ll receive an email or text with a link to the video chat. On the day of your appointment simply click the link at your appointment time and you’ll be connected with the doctor.
During the consultation, the doctor will ask you about your symptoms and medical history. They may also order some tests, like blood work or X-rays, which can be done at a local lab at a later date. The doctor will then make a diagnosis and recommend a treatment plan. If you have any questions, you can ask them during the consultation.
What are the benefits of virtual doctor visits?
There are a few benefits of virtual doctor visits that are worth mentioning:
*They’re convenient:* As we mentioned before, you can consult with a doctor from the comfort of your own home. No need to drive across town and spend time in a waiting room.
*They’re affordable:* Virtual doctor visits are often cheaper than in-person visits since you’re not paying for the doctor’s office overhead.
*You can see a specialist:* /If you live in a rural area, you may not have access to certain specialists. With a virtual doctor visit, you can consult with any specialist, no matter where they’re located.
The benefits generally outweigh the negatives, but there are a few potential downsides to consider as well
What are the drawbacks of virtual doctor visits?
There are a few potential drawbacks of virtual doctor visits that are worth mentioning:
They’re not suitable for emergency care: if you’re having a heart attack or another medical emergency, you’ll still need to go to the hospital immediately.
You may not have access to certain tests: if the doctor needs to order a CT scan or MRI, you’ll need to go to a local imaging center.
The doctor may not be able to prescribe certain medications: if the doctor needs to prescribe a controlled substance, like narcotic pain medication, they may not be able to do so.
Are virtual doctor visits covered by insurance?
This is a tricky question since insurance coverage varies so much. In general, however, most insurance companies will cover at least part of the cost of a virtual doctor visit. Check with your insurance company to find out if they cover virtual doctor visits and, if so, how much they’ll cover.
How do I find a doctor for a virtual visit?
If you’re interested in scheduling a virtual doctor visit, the best place to start is by asking your regular doctor if they offer virtual visits. Many primary care physicians and specialists offer virtual visits these days. You can also search for doctors that offer virtual visits in your area.
Virtual doctor visits are a convenient and affordable way to consult with a doctor from the comfort of your own home. However, they’re not suitable for emergency care and you may not have access to certain tests or medications.
If you have any other questions or need help figuring out how to stay connected with your virtual physician don’t hesitate to contact us!
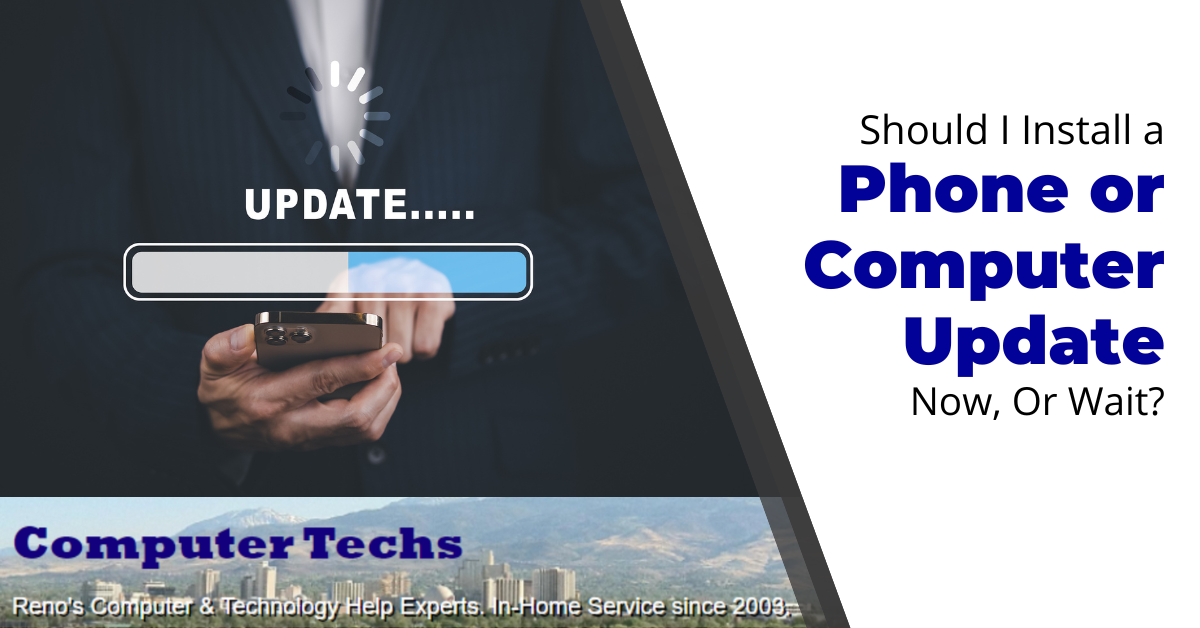
Read the details of the update to determine if it’s a security or feature update – or both.
Install security updates right away.
It’s best to wait to install feature updates for at least a few weeks after release.
We’ve all been there before. You’re in the middle of working on something important when a notification pops up letting you know there’s an update available for your phone or computer.
Should you stop what you’re doing and install it right away? Or can it wait?
It can be tempting to just ignore the notification and continue on with your work, but it’s important to remember that updates usually contain important security patches or new features that can improve your experience. So how do you decide when to install an update?
Here’s a quick guide to help you make the decision.
Why Updates are Important
There are two main reasons why it’s important to keep your devices updated: security and new features.
Security updates usually address specific vulnerabilities that have been found in the software. By installing these updates, you can help protect your device from being hacked or compromised.
New features, on the other hand, can improve your experience using the device. For example, a new operating system update might include a better interface, more efficient battery usage, or support for new applications
How to Decide When to Install an Update
So now that you know why updates are important, how do you decide when to install them?
If the update is a security patch, it’s generally a good idea to install it as soon as possible. These types of updates are usually critical and can help protect your device from any external threats.
If the update is a new feature, it depends on how important the new feature is to you. If it’s something that you really need or would improve your experience using the device, then it’s probably worth installing the update right away. However, if it’s something that you can live without, you may want to wait until you have some downtime to install it.
Why You Might Want to Wait to Install an Update
There are a few reasons why you might want to wait to install an update:
The update is a major release: Major releases often contain a lot of new features and can take up a lot of space on your device. If you don’t have enough storage or you’re in the middle of something important, you may want to wait until you have some free time to install the update.
You’re worried about losing data: If you’re worried about losing data or having problems with the update, you may want to wait until you have a backup or some free time to troubleshoot any potential issues.
You’re not ready for the new features: If you’re not ready for the new features in the update, you may want to wait until you’re more familiar with the device or you have some free time to explore the new features.
How to Set Your Update Preferences
Most devices will allow you to choose when you want to install updates. For example, you can usually set your device to automatically install updates or to prompt you before installing an update.
If you’re not sure how to set your update preferences, you can usually find the option in the settings menu on your device. Once you’ve set your preferences, your device will usually handle the rest.
Always Keep Your Devices Up-To-Date?
There’s no right or wrong answer to this question. It really depends on your personal preferences and needs. If you’re someone who values security and always wants to have the latest features, then you’ll probably want to keep your devices up-to-date.
On the other hand, if you’re someone who values stability and doesn’t mind missing out on the latest features, you may want to wait until there’s a major release or you have some free time before installing an update.
Choose what’s right for you
At the end of the day, it’s up to you to decide when to install an update. Just remember to keep security and new features in mind when making your decision. It’s also a good idea to familiarize yourself with your device’s update preferences so you can choose when and how you want to install updates.
If you have any other questions or need help setting up your updates don’t hesitate to contact us!
Cybersecurity isn’t just about companies preventing their networks from being breached. It’s something that everyone that uses technology needs to be mindful of. On a personal level, you can think of it as information and device security.
Stopping hackers from getting to your personal data and keeping dangerous viruses out of your computer requires a personal level of cybersecurity. Being safe online is one part of the equation. The consequences of being lax about things like passwords and using free Wi-Fi without safeguards can be high.
Over 24 million Americans have had online accounts taken over by hackers, this includes workplace retirement apps. It’s scary to think of accounts having to do with your money being emptied by a scammer, but it happens all too often. Last year, account takeovers rose nearly 72%.
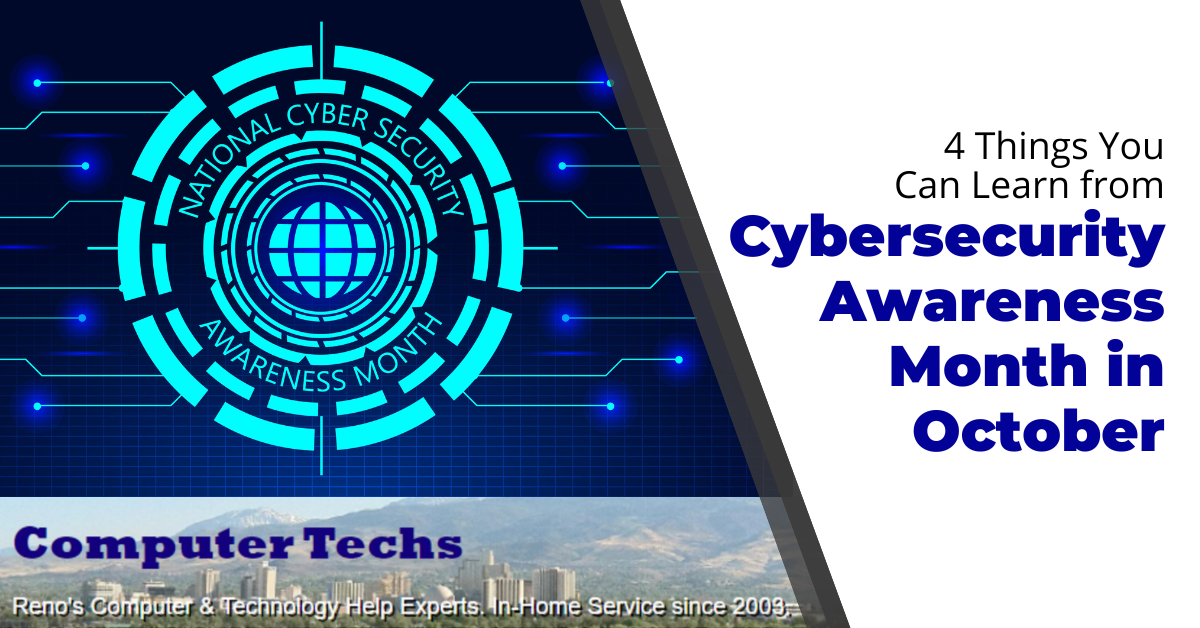
Every October, two US government agencies promote Cybersecurity Awareness Month. The Cybersecurity and Infrastructure Security Agency (CISA) and the National Cybersecurity Alliance (NCA) provide helpful tips and resources for both consumers and businesses to raise cybersecurity awareness.
Why not take some time this October to brush up on your security hygiene? You can visit the Cybersecurity Awareness Month website to get some free resources, and below we’ll highlight four key best practices being promoted this year.
Tips to Be “Cyber Smart” and Protect Your Data
This year’s Cybersecurity Awareness Month theme is “See Yourself in Cyber” and it’s all about breaking the misconception that cybersecurity is just for companies and IT people.
The site notes that cybersecurity is really all about people adopting best practices when using computers, mobile phones, and accessing online accounts.
Here are four simple, but effective ways to improve your cyber hygiene and keep your devices and online accounts from being hacked.
Enable Multi-Factor Authentication
Multi-factor authentication (MFA) is also called two-factor authentication (2FA) and two-step verification. What it means is that there is more than one step to gain access to your account.
MFA is very, very effective at stopping scammers from breaching your online accounts, such as a bank account, Facebook account, Amazon account, and others. Microsoft, which sees about 300 million attempts by hackers to breach its cloud services each day, says that using multi-factor authentication can stop 99.9% of attempted fake sign-ins.
With MFA/2FA, you will receive an additional prompt before you can access your account. This typically will come in the form of a one-time passcode (OTP) that is sent to your mobile phone.
Once you log in with your username and password, you will normally see a button to send the MFA code. Some systems give you a choice to send via text, email, or automated voice call. This OTP is usually about 5 or 6 digits, and you need to enter it to get access.
How do you add MFA/2FA to an account?
Go to your account settings for an online account.
Look for an area for privacy or security.
If there is a search option in the settings, search on either “multi-factor, two-factor, or two-step.
When you find this, turn this feature on.
Go through the prompts to set up a phone number (or another method) to receive the one-time passcode.
Tip: Open a new browser tabs to quickly check your email for a one-time passcode, then go back to the website to enter the passcode you just received.
The #1 cause of data breaches around the world is not some big virus or another form of malware. It’s breached passwords. Hackers are having a field day breaking into personal and business accounts by guessing, stealing, and otherwise compromising weak passwords.
Ditch those easy passwords that you find simple to remember. If they’re easy to remember, then they are easy to hack. You should use strong password best practices to create passwords.
Strong passwords look like this:
Have at least 10-12 characters
Use at least one uppercase letter
Use at least one symbol
Use at least one number
The best way to manage strong and unique passwords for every login is to use a password manager. There are both free and paid versions you can find online. Just be sure to use a reputable password management tool. I use LastPass since I can use it on multiple operating systems and devices. You can also use the password manager built into your browser or operating system as long as your devices are password protected.
Recognize Phishing
Fake emails and text messages can trick you into giving away your login information to a website. They can also cause you to download malware. Phishing can look like a shipping notification from Amazon or an urgent notification to update your email account.
Learn how to recognize phishing so you can avoid falling into its trap. It’s also helpful to use an email system – such as Gmail – with good spam and phishing detection.
Phishing recognition tips:
Hover over links without clicking them to see the real URL
Any slight misspellings or grammar that is “off”
If the email is unexpected (such as a receipt for something you never bought)
An email address that uses the company name first, instead of after the @ symbol – for example: (name of bank)@strangedomain.com instead of contact@(name of bank).com
Update Your Software
Software often has vulnerabilities that allow hackers to exploit a device. For example, poorly written code might allow a scammer to use a loophole to take control of your computer or smartphone.
Your best defense against software and operating system vulnerabilities is to keep all software and apps on your devices updated regularly. Those updates will include the latest patches for newly found vulnerabilities that keep hackers from using them.
Get Help With Your Personal Cybersecurity
Computer Techs enjoys working with Reno area residents to improve their cyber hygiene. We can help with virus scan and removal, email filtering to reduce phishing, MFA setup, and much more.
We’ve all seen them before: those little icons that show up in our taskbars next to the clock. They come in all sorts of shapes and colors.
*But, what do they mean?*
The specific icons may vary depending on your operating system of your computer, but they will usually have similar functionality.
While some of them are fairly self-explanatory, others can be a bit more confusing. Let’s take a look at what some of the most common taskbar icons mean.
Sound Icon
One of the most common taskbar icons is the sound/speaker icon. This icon indicates the status of the sound on your system.
For example, if the speaker is crossed out, that might mean that your system’s sound is muted or disabled.
You can usually click the icon to toggle your sound on/off or to change the system’s output to another device (for example, for switching over to some Bluetooth headphones or speakers).
Wi-Fi / Network Icon
Another common taskbar icon is the Wi-Fi icon (or networking icon if you’re connected via ethernet cable to your router). This looks like a small dot with waves coming out of the top, forming somewhat of an upside-down triangle.
This icon lets you know if you’re connected to a network or not.
If you’re on Wi-Fi and the icon has full bars that means you have a strong connection. If the icon is empty or grayed out, that means your connection is weak you don’t have a connection, respectively.
When you hover your mouse over the icon, you’ll also see the name of the network you’re currently connected to.
If you’re not connected to a network, you might see “Not connected” instead.
It’s also a quick way to access the network settings, which can be useful if you need to troubleshoot a connection issue or change your Wi-Fi password.
Battery / Power Indicator Icon
Probably one of the most important icons for laptop/mobile users will be the battery icon. This one lets you know, at a glance, how much battery life your laptop or mobile device has.
The more full the icon, the more battery life you have. If the icon is empty, that means your battery is running low and you should plug in your laptop soon.
If you’re connected to power it will let you know your current charging status and how much time is left before your battery is fully charged.
Bluetooth Icon
If you have Bluetooth turned on, you’ll see a Bluetooth icon in your taskbar. This one looks kind of like a jagged capital “B” letter.
This icon lets you know that your system is able to connect to wireless Bluetooth devices and the status of your Bluetooth connections – such as a wireless speaker/headphones, keyboard or mouse.
You can usually click on the icon to see a list of available Bluetooth devices that you can connect to.
Airplane Mode Icon
The airplane mode icon is another common and quite useful icon. It allows you to toggle airplane mode on/off. It will look like an airplane on most devices.
Airplane mode is a setting that disables all wireless communication on your device. This includes things like Wi-Fi, Bluetooth, and cellular data.
You’ll usually only use this icon when you’re on an airplane (hence the name) but you might also find it useful in other places where wireless communication is not allowed.
Boost Productivity
Now that you know what some of the most common taskbar icons mean, you can start using them to your advantage.
For example, if you’re trying to conserve battery life, you can click on the battery icon and see how much power you have left. If you’re trying to be productive and minimize distractions, you can click on the speaker icon to mute your sound.
Knowing what the taskbar icons mean can also help you troubleshoot problems.
For example, if your sound isn’t working, you can check to see if the speaker icon is crossed out. If it is, that means your sound is muted and you can just click on the icon to unmute it.
Need Expert Computer Help?
Overall, the taskbar icons are a helpful way to see what’s going on with your computer at a glance.
Next time you’re looking at your taskbar, take a minute to familiarize yourself with the icons and what they mean. It’ll come in handy more often than you think!
We hope this article has helped you understand what some of the more common icons on your taskbar mean.
If you have any other questions about taskbar icons, or need computer help of any kind, don’t hesitate to contact us!
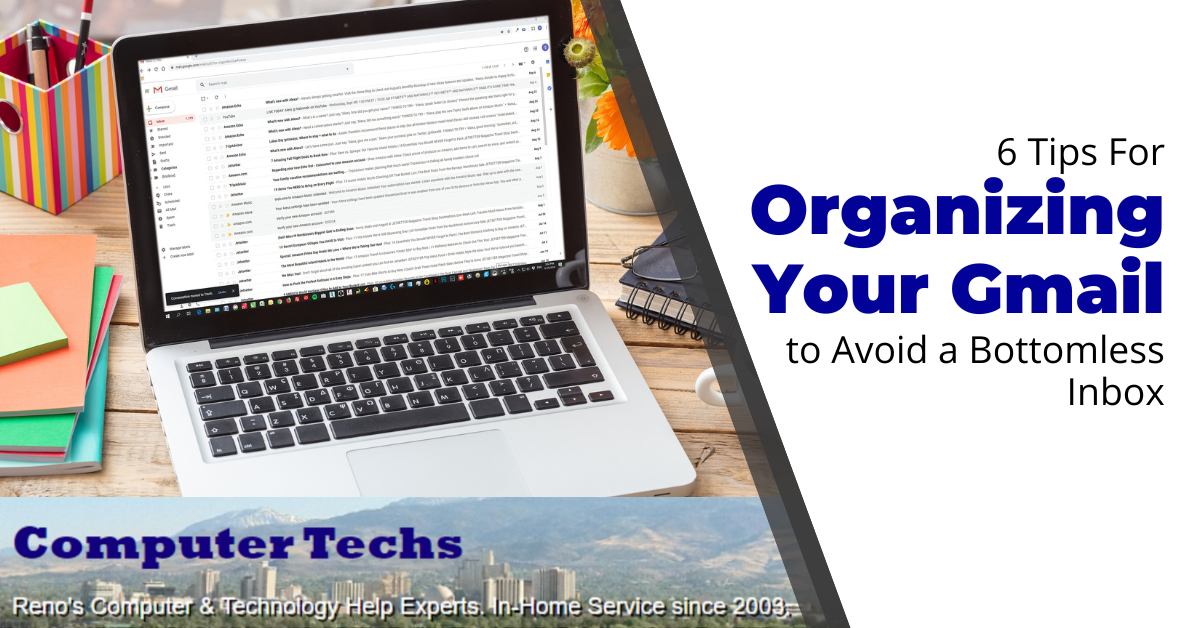
How often have you missed out on an appointment, paying a bill, or responding to an important message because the e-mail notice got lost in your cluttered inbox?
Every day, we receive lots of e-mails, both important and unimportant, which can be overwhelming. Due to the numerous amount of e-mails, it can cause unnecessary stress, including taking up time to clear them out and differentiate between the important and unimportant.
One thing that quickly fills up e-mail inboxes is newsletters, e-mail circulars, catalogs, and event invitations. These e-mails contribute to the build-up of e-mails in your inbox.
According to Marketing Charts, 84.5% of e-mails in the inbox are promotions, while 86.8% of e-mails in the inbox are updates. Only 55.5% of e-mails in the inbox are primary e-mails. However, whatever the reason, the accumulation of all these e-mails over time if left unmanaged will cause your Gmail to be filled with a bottomless inbox of unread messages.
Especially for the elderly, it is essential to keep Gmail organized. This helps them focus on important tasks and frees up valuable time. With an organized Gmail, you will be able to get important and relevant messages and meet up with various payments and appointments.
You don’t have to dread opening your Gmail account. Here are some essential tips to help organize your Gmail.
Tips to Organize Your Gmail to Avoid Endless Inbox: Six Effective Ways
1. Create Labels
This is a great way to organize your Gmail. One of the great features of Gmail is that they use labels instead of folders. This labeling system allows you to associate e-mails with different subjects, senders, and categories. You can have labels like “Friends and family,” “Bills,” “Invites,” and more. As a result, when a mail comes in, it goes into the appropriate label, keeping your Gmail organized.
Creating the label
To create a label, one method is to click the “+” icon next to Labels in the left-hand column. Name your label such as “Travel”, “Bills”, “Appointments” or “Friends” – and give it a color if you wish.
Organize your Gmail inbox with labels
Step 1: Once you have created your label(s), you will see it in the list under the Labels section.
Step 2: To add the e-mails associated with each label, select the message and open it.
Step 3: At the top of the mail is a list of icons. Click on the label icon to add the label to the message. A drop-down label list will appear (if your label is not visible, click more), select the appropriate label, and select “Apply.”
Step 4: Create a filter.
On the right side, click on the three dots and select “Manage Inbox Setting.”
Go to “Filter and Blocked Addresses.”
Select “Create a new filter.”
Insert the “From” address. You can type the e-mail address or select it from the drop-down menu. Ignore the other fields. Once done, create a filter. Look for “Apply the label” and choose the label. Next, click “Create filter.”
2. Archive Unimportant E-mails or Ones You Don’t Need
Removing unwanted e-mails creates space. However, we often don’t delete e-mails because we might need them later. So instead of keeping and piling them stored in your inbox, you could Archive them. This doesn’t delete them; they are just removed from your inbox and stored in the “All Mail” folder. This keeps your Gmail inbox looking organized.
To archive an e-mail message in Gmail:
Open an e-mail, or select e-mail(s) from the list of messages.
Click the “Archive” button, and the message is archived.
Remember, the e-mail is not deleted. You can still see all e-mails archived in the “All Mail” folder.
3. Make Unread E-mails Important or Come First
Many e-mails are received daily, and you won’t want to miss an important mail, such as a medical appointment reminder, in your bottomless unread e-mails. You can change the settings by putting unread e-mails on top or setting it as important.
On the upper-right side, click on the Settings gear icon then choose the Inbox type as “Unread first”. You can also change it to “Important first”, “Starred first”, “Priority Inbox”, and others.
In the Inbox section, if you selected “Priority Inbox”, you can arrange the section in order of how you want the mail to appear.
Scroll to the bottom and click “Save changes.”
4. Unsubscribe from newsletters and unwanted e-mails
Newsletters can be sent numerous times daily, piling up in your inbox. You can unsubscribe from the brand to stop receiving newsletters or promotional e-mails.
Look for an “unsubscribe” or “manage preferences” link in the bottom footer of the email then click it. Follow any further instructions.
5. Star important messages so they are easy to find later
Star important e-mails to make them easy to find. This works similar to the “Important” option, except this helps you focus on the more important e-mails.
Assigning stars to Gmail messages is easy:
Go to your inbox and select the e-mail you want to star
Click on the star icon. As a result, you can easily find the emails that you’ve starred in the “Starred” folder.
6. Search for e-mails and delete or archive many at once
Chromebooks offer a less-expensive alternative to a traditional laptop, however they offer less features and flexibility.
Many things we do on a computer these days can be done in a web-browser – from email, messaging and conferencing, listening to music, watching video, word processing and spreadsheets, and of course everyday reading and web browsing.
If you can imagine using just a Google Chrome browser for all of your computing needs, then a Chromebook may be right for you.
On the surface, laptops and Chromebooks have the same build and element; however, one has to be better than the other for your needs.
Laptops have existed for years, a portable version of the desktop computer with the screen, keyboard, pointer, storage and “smarts” all-in-one device.. Chromebooks are a new breed that is different from regular laptops. They are budget-friendly and are sometimes faster. Though they are inexpensive, they are not for everyone.
The main thing to note when comparing a Chromebook to a laptop is their differences. Aside from the price, the main difference is the operating system. Chromebooks, running the ChromeOS operating system, can do the things laptops do, such as listening to music, streaming and watching videos, editing pictures, and more.
This, however, does not bring down the value of laptops. If you want to know which is better between Chromebooks and laptops, continue reading this article for a detailed breakdown.
What is a Chromebook?
Chromebooks are relatively new products to the mobile computer category. Chromebooks are technically laptops but look like notebooks from the outside. They are lightweight computers that run on the Linux-based Google Chrome OS, with the Chrome browser as its main interface.
Thanks to their simplified design and ease of use, Chromebooks are a prevalent choice, especially in the education sector. They are meant for browsing and light work, making them perfect for studying and researching.
According to a study, the sales of Chromebooks dropped 67% in the first quarter of 2022. However, Chromebook is still making an impact as people tend to buy more for educational purposes.
Chromebook relies on Google apps and cloud services to function because they don’t require a lot of RAM or heavy processing power. It has everything from a music and video player to word processing. It can sync with your Android devices and is updated automatically. Therefore, it goes without saying that a Chromebook can do most of the things a laptop can do.
Although Chromebooks can’t replace feature-rich laptops, they are for people on a budget and are worth every penny.
What is a laptop?
Laptops, as previously stated, are the ‘Undisputed Kings of Mobile Computers.’ They have the abilities of a desktop computer but are mobile and easy to use.
Unlike Chromebooks that run on the Chrome OS, laptops run on Windows OS and macOS and are more well-rounded. They have more resources and require powerful components to work effectively.
Laptops were built to consume less power and are equipped with lots of RAM and heavy processing power to handle tasks effortlessly. They are used by anyone in various industrial, commercial, and even educational sectors. Due to their powerful OS, they can work with demanding software.
You can compare laptops to jack-of-trades; however, they are expensive.
Differences Between Chromebook and Laptop: Which is Better?
Operating System
There are three main competing operating systems for laptops: Windows OS (10, 11, or others), OS X for MacBook, and Linux. On the other hand, the operating system for Chromebook is ChromeOS.
The ChromeOS is a Google-developed OS and is similar and feels instantly familiar to the Google Chrome browser. Due to its smaller OS, it tends to load faster. In contrast, Windows 10, by far, has a large OS. This can be a blessing and a curse. Because laptops have a more extensive OS, they are more flexible and can run complex tasks and programs. However, it’s heavy, tends to load slowly, and requires regular updates.
Storage Capacity
Laptops come in various types of storage configurations. They have SSD, HDD, 3TB hard drive, and more storage capacities. There are laptops available for your specific storage; either you want an operating system on an SSD or games/movies on an HDD. The storage capacity of laptops includes 256GB, 512GB, 1TB, and more.
In contrast, Chromebooks only have an SSD storage capacity with onboard storage of 32GB or 64GB. As compensation, Chromebook has a cloud storage capacity of 100GB.
You should go for a laptop if you don’t want to store your data in the cloud.
Performance
Performance is comparative. A machine’s performance is influenced by its specs, workload, and other factors. Based on specs, a Chromebook outperforms the laptop.
However, if what you want is a great performance, you won’t get it in a Chromebook. Laptops have all the necessary power to perform and run anything thrown at them. Also, they are compatible with demanding software.
Battery life
In terms of battery life, Chromebooks have a battery life of about 10-12 hours. In contrast, laptops have a battery life of about 8 to 10 hours.
In laptops, the battery’s energy is mainly consumed from their processor, graphics card, and performance demands. However, because Chromebooks mostly rely on the internet, they do not require powerful processors or graphics cards, which results in lower battery use.
As a result, the life of the battery is dependent on the Chromebook or laptop’s performance.
Price
Without a doubt, Chromebooks are more budget-friendly than laptops. Due to the hardware specs and the OS on laptops, they are more expensive. In contrast, because Chromebooks have minimal hardware specs and rely on the internet, they are more affordable.
Portability
When it comes to portability, Chromebooks have the upper hand. They are thin, lightweight, and have minimal hardware. In contrast, laptops come in various sizes, weights, and dimensions. Some laptops are light and thin, and some are heavy.
As a result, Chromebooks are more portable than laptops.
Offline Capabilities
Laptops are in the lead with their great offline capabilities. Without using the internet, you can utilize various software, do work or academic activities, play games, and perform multiple other tasks.
In contrast, Chromebooks have limited offline capabilities and require a constant internet connection to function properly.
Which is better? Laptops or Chromebooks?
It appears that the choice between Chromebooks and laptops will ultimately come down to personal preference.
Knowing what you’ll use your Chromebook or laptop for most of the time is the only way to determine if it’s the best choice for you. A Chromebook is the best option if all you need is to go online, open websites, and type away at will.
But investing your money in a laptop might be better if you require greater flexibility.
Contact us at Computer Techs if you find it difficult to decide between a laptop or a Chromebook.
Web browsers are your gateway to the internet or World Wide Web. Browsers contain a lot of features that make your online experience more efficient. This includes things like tabs that allow you to open different web pages at the same time, and “bookmarks” or “favorites” that let you save website addresses so that you don’t have to type-in or search for frequently visited websites.
Some of the most popular browsers are Google Chrome, Mozilla Firefox, Microsoft Edge, Apple Safari, and Opera. These browsers have many useful features to help you get things done with ease. While some features of the browsers are known, others are either unknown or under-utilized,
Here, we’ll discuss some of the great features of your browser that you may not be using yet.
Cybercriminals are continuously targeting naïve individuals. They do not discriminate when it comes to defrauding people. They’ll obtain money from anyone – young, old, poor, and rich. The American Journal of Public health notes that about 5% of adults get scammed yearly.
In the United States, older adults lose about $40 billion per year due to cyberattacks. Cybercriminals can easily exploit the information of an older adult, which can be obtained through smartphones or computer systems. Unfortunately, senior citizens are easy targets of cybercriminals because of their inexperience with using technology. Many older citizens have social media accounts, surf the internet, and use credit cards online. Unlike the younger generation, older adults are generally less aware of cybercriminals’ activities, and as such, they lack the necessary information to help them stay protected from these malicious activities.
Cybercriminals may reach out in a non-suspicious manner. They may send a link through a legitimate email and offer to assist them with resolving issues. Or they may send an email posing as a company offering cheap vacation trips, or even coupons or prizes.
These fake emails are called phishing. The criminal is trying to fish for victims, just like fishermen fish for bass, trout, etc. The fake emails act as their lures. Phishing is one of the main causes of all types of data breaches, credit card theft, and other cybersecurity issues.
Then, these hackers will proceed to request personal information from the unsuspecting victim. They will use the information generated to access their credit cards and defraud them if successful.
Scams targeting the elderly population are becoming rampant in the United States, and their effect on them is damaging. For online criminals, scamming the elderly can bring easy monetary rewards.
One way to protect yourself from these malicious activities is to use the SLAM method of phishing detection. SLAM is an acronym that represents:
Sender
Links
Attachment
Message
How To Identify Dangerous Emails Using The SLAM Method
SLAM is an acronym that guides you to identify if an email is fraudulent. With it, you can easily recognize when cybercriminals use emails to carry out a phishing attempt.
S- Sender
As a rule, pay attention to the sender’s email address. Cybercriminals often use the email address of a trusted entity to carry out phishing attacks. So, don’t be in haste to open the email. It is best to ascertain the validity of the sender’s email address. You can do this by hovering your mouse over the sender’s name. It gives you appropriate information on the sender.
Cybercriminals often make little adjustments to the email addresses they want to use in carrying out a phishing attack. Look out for spelling errors or additional letters in the email addresses. If something doesn’t look right, then it probably isn’t.
L- Link
Many phishing emails have links in them. These links prompt the recipients to click on them so that they can reveal sensitive or personal information. Sometimes, the link in the phishing mail looks helpful and could even offer assistance in resolving bank, health, or payment issues. The link then redirects the user to a login page that may look very similar to one they are used to seeing. This is called a spoofed login page. It’s made to trick the victim into inputting their username and password for a specific site.
A-Attachment
Malicious attachments are standard in phishing emails. To stay safe, it is not advisable to open any attachments in your emails that you aren’t absolutely sure are safe and from a legitimate source. When you download a malicious attachment, it enables hackers to gain access to your device and compromise it. Therefore, don’t open an attachment in your email unless you confirm it is authentic.
M- Message
This represents the content of the email. Although many scammers have become very sophisticated in sending messages, many phishing emails have recognizable flaws such as misspellings, punctuation and capitalization errors, wrong or mis-formatted dates, and generic/non-personalized greetings.
Take the phishing quiz to see if you can spot phishing emails
Test how well you can follow the SLAM method by taking the following quiz which will open in a new tab: Phishing Quiz
Before conversing with a stranger/potential scammer, contact us if you have questions about a suspicious email, text or phone call.
Payment apps like Zelle and Venmo are a customer favorite because they are a convenient, fast, and easy way of electronically exchanging money between others. Zelle’s popularity and quick exchange of funds between one bank and another attracts more than just new customers. Unfortunately, it attracts hackers and scammers too.
With so many headlines about Zelle scams on the news lately, many users can’t help but wonder about the platform’s safety. Scammers target Zelle users and siphon off their hard-earned money through phishing scams. The truth is, Zelle is safe as long as you are careful, and you pay attention.
By the time you’re done reading this article, you’ll know more about Zelle and how you can safely use the platform without falling victim to scammers.
What exactly is Zelle?
Zelle is a popular payment application operating a peer-to-peer (P2P) model. It makes it easy for users to move money and pay for things without going to the bank or handling cash. Zelle is the joint effort of several major banks in the US. It’s easy to use through an iPhone and Android app. Zelle also integrates with the mobile app of major banks such as Bank of America, Wells Fargo and Chase.
How does the Zelle scam work?
Zelle scams are mainly social engineering scams. Social engineering is manipulating or influencing people using scare tactics or fraudulent information. Scammers trick consumers into unintentionally authorizing money transfers by making fraudulent claims and promises.
One of the most common Zelle scams involves sending a text message or an email requesting confirmation for what ends up being a fake payment. Most users often respond to try and disprove the transaction. Instead of putting the scammers off, it opens the door for further communication. The scammers then call the user pretending to be from the user’s bank and pretend to give the user instructions that’ll reverse the claim. In reality, the money ends up in the scammer’s account.
Safety precautions when using Zelle
While the news may sound scary, most Zelle scams are social engineering. As long as you heed the precautions below, you should be relatively safe.
Only use Zelle for people or businesses you trust
P2P payments should not be used to send money to anyone you don’t know and should rarely be used for online purchases. Only use Zelle to send money to your family and friends if possible. Verify that the phone number, email, and recipient’s name are all correct.
Ignore unsolicited emails and text messages
Your bank will rarely contact you unsolicited. If you received a message from any party posing as a banking representative when you haven’t contacted them, ignore it. Reach out to your bank directly and ask them to check your account for any suspicious activity.
If you gave out your personal details before you noticed anything, that is, you fell for the phishing scam, call your bank so they can help you secure the account.
Use two-factor authentication (2FA)
Two-factor, two-step, or multi-factor authentication is a security process that helps secure your accounts by asking users to verify their identity using two different authentication factors. When you authorize 2FA, you’ll need to input a one-time password (OTP) anytime you sign in to your account. You should never share your OTP with anyone, no matter how insistent they appear. Criminals posing as your bank may demand your passcode for various reasons, but no legitimate bank will ever ask for it.
Don’t get pressured by urgent or immediate payments
If you observe any suspicious behavior from someone claiming to be a representative of your bank, a utility, or another institution demanding quick payment, it’s likely a scam. End the call and reach out to the business through official channels.
Scammers also send payment requests from businesses, banks, and utilities you don’t pay with Zelle to trip you up. Confirm from the organization’s official channels that the request is legitimate before paying.
Be cautious of anyone insisting on using only Zelle
Anyone who insists on transacting only through Zelle should send warning bells to your mind. If they say the only payment option they can accept is Zelle, then make sure the transaction and the individual are genuine before sending any money.
Don’t send money to yourself
Scammers may try to get you to authorize a reversal by claiming that a payment failed to go through or that your account has been compromised. Remember that banks won’t reach out to you unless you contact them first.
We’re Here to Help Keep Your Tech Safe
Need more information on staying safe while using online apps? Then visit Computer Techs. Schedule an appointment by calling 775-624-6888