Cybersecurity isn’t just about companies preventing their networks from being breached. It’s something that everyone that uses technology needs to be mindful of. On a personal level, you can think of it as information and device security.
Stopping hackers from getting to your personal data and keeping dangerous viruses out of your computer requires a personal level of cybersecurity. Being safe online is one part of the equation. The consequences of being lax about things like passwords and using free Wi-Fi without safeguards can be high.
Over 24 million Americans have had online accounts taken over by hackers, this includes workplace retirement apps. It’s scary to think of accounts having to do with your money being emptied by a scammer, but it happens all too often. Last year, account takeovers rose nearly 72%.
Every October, two US government agencies promote Cybersecurity Awareness Month. The Cybersecurity and Infrastructure Security Agency (CISA) and the National Cybersecurity Alliance (NCA) provide helpful tips and resources for both consumers and businesses to raise cybersecurity awareness.
Why not take some time this October to brush up on your security hygiene? You can visit the Cybersecurity Awareness Month website to get some free resources, and below we’ll highlight four key best practices being promoted this year.
Tips to Be “Cyber Smart” and Protect Your Data
This year’s Cybersecurity Awareness Month theme is “See Yourself in Cyber” and it’s all about breaking the misconception that cybersecurity is just for companies and IT people.
The site notes that cybersecurity is really all about people adopting best practices when using computers, mobile phones, and accessing online accounts.
Here are four simple, but effective ways to improve your cyber hygiene and keep your devices and online accounts from being hacked.
Enable Multi-Factor Authentication
Multi-factor authentication (MFA) is also called two-factor authentication (2FA) and two-step verification. What it means is that there is more than one step to gain access to your account.
MFA is very, very effective at stopping scammers from breaching your online accounts, such as a bank account, Facebook account, Amazon account, and others. Microsoft, which sees about 300 million attempts by hackers to breach its cloud services each day, says that using multi-factor authentication can stop 99.9% of attempted fake sign-ins.
With MFA/2FA, you will receive an additional prompt before you can access your account. This typically will come in the form of a one-time passcode (OTP) that is sent to your mobile phone.
Once you log in with your username and password, you will normally see a button to send the MFA code. Some systems give you a choice to send via text, email, or automated voice call. This OTP is usually about 5 or 6 digits, and you need to enter it to get access.
How do you add MFA/2FA to an account?
Go to your account settings for an online account.
Look for an area for privacy or security.
If there is a search option in the settings, search on either “multi-factor, two-factor, or two-step.
When you find this, turn this feature on.
Go through the prompts to set up a phone number (or another method) to receive the one-time passcode.
Tip: Open a new browser tabs to quickly check your email for a one-time passcode, then go back to the website to enter the passcode you just received.
The #1 cause of data breaches around the world is not some big virus or another form of malware. It’s breached passwords. Hackers are having a field day breaking into personal and business accounts by guessing, stealing, and otherwise compromising weak passwords.
Ditch those easy passwords that you find simple to remember. If they’re easy to remember, then they are easy to hack. You should use strong password best practices to create passwords.
Strong passwords look like this:
Have at least 10-12 characters
Use at least one uppercase letter
Use at least one symbol
Use at least one number
The best way to manage strong and unique passwords for every login is to use a password manager. There are both free and paid versions you can find online. Just be sure to use a reputable password management tool. I use LastPass since I can use it on multiple operating systems and devices. You can also use the password manager built into your browser or operating system as long as your devices are password protected.
Recognize Phishing
Fake emails and text messages can trick you into giving away your login information to a website. They can also cause you to download malware. Phishing can look like a shipping notification from Amazon or an urgent notification to update your email account.
Learn how to recognize phishing so you can avoid falling into its trap. It’s also helpful to use an email system – such as Gmail – with good spam and phishing detection.
Phishing recognition tips:
Hover over links without clicking them to see the real URL
Any slight misspellings or grammar that is “off”
If the email is unexpected (such as a receipt for something you never bought)
An email address that uses the company name first, instead of after the @ symbol – for example: (name of bank)@strangedomain.com instead of contact@(name of bank).com
Update Your Software
Software often has vulnerabilities that allow hackers to exploit a device. For example, poorly written code might allow a scammer to use a loophole to take control of your computer or smartphone.
Your best defense against software and operating system vulnerabilities is to keep all software and apps on your devices updated regularly. Those updates will include the latest patches for newly found vulnerabilities that keep hackers from using them.
Get Help With Your Personal Cybersecurity
Computer Techs enjoys working with Reno area residents to improve their cyber hygiene. We can help with virus scan and removal, email filtering to reduce phishing, MFA setup, and much more.
We’ve all seen them before: those little icons that show up in our taskbars next to the clock. They come in all sorts of shapes and colors.
*But, what do they mean?*
The specific icons may vary depending on your operating system of your computer, but they will usually have similar functionality.
While some of them are fairly self-explanatory, others can be a bit more confusing. Let’s take a look at what some of the most common taskbar icons mean.
Sound Icon
One of the most common taskbar icons is the sound/speaker icon. This icon indicates the status of the sound on your system.
For example, if the speaker is crossed out, that might mean that your system’s sound is muted or disabled.
You can usually click the icon to toggle your sound on/off or to change the system’s output to another device (for example, for switching over to some Bluetooth headphones or speakers).
Wi-Fi / Network Icon
Another common taskbar icon is the Wi-Fi icon (or networking icon if you’re connected via ethernet cable to your router). This looks like a small dot with waves coming out of the top, forming somewhat of an upside-down triangle.
This icon lets you know if you’re connected to a network or not.
If you’re on Wi-Fi and the icon has full bars that means you have a strong connection. If the icon is empty or grayed out, that means your connection is weak you don’t have a connection, respectively.
When you hover your mouse over the icon, you’ll also see the name of the network you’re currently connected to.
If you’re not connected to a network, you might see “Not connected” instead.
It’s also a quick way to access the network settings, which can be useful if you need to troubleshoot a connection issue or change your Wi-Fi password.
Battery / Power Indicator Icon
Probably one of the most important icons for laptop/mobile users will be the battery icon. This one lets you know, at a glance, how much battery life your laptop or mobile device has.
The more full the icon, the more battery life you have. If the icon is empty, that means your battery is running low and you should plug in your laptop soon.
If you’re connected to power it will let you know your current charging status and how much time is left before your battery is fully charged.
Bluetooth Icon
If you have Bluetooth turned on, you’ll see a Bluetooth icon in your taskbar. This one looks kind of like a jagged capital “B” letter.
This icon lets you know that your system is able to connect to wireless Bluetooth devices and the status of your Bluetooth connections – such as a wireless speaker/headphones, keyboard or mouse.
You can usually click on the icon to see a list of available Bluetooth devices that you can connect to.
Airplane Mode Icon
The airplane mode icon is another common and quite useful icon. It allows you to toggle airplane mode on/off. It will look like an airplane on most devices.
Airplane mode is a setting that disables all wireless communication on your device. This includes things like Wi-Fi, Bluetooth, and cellular data.
You’ll usually only use this icon when you’re on an airplane (hence the name) but you might also find it useful in other places where wireless communication is not allowed.
Boost Productivity
Now that you know what some of the most common taskbar icons mean, you can start using them to your advantage.
For example, if you’re trying to conserve battery life, you can click on the battery icon and see how much power you have left. If you’re trying to be productive and minimize distractions, you can click on the speaker icon to mute your sound.
Knowing what the taskbar icons mean can also help you troubleshoot problems.
For example, if your sound isn’t working, you can check to see if the speaker icon is crossed out. If it is, that means your sound is muted and you can just click on the icon to unmute it.
Need Expert Computer Help?
Overall, the taskbar icons are a helpful way to see what’s going on with your computer at a glance.
Next time you’re looking at your taskbar, take a minute to familiarize yourself with the icons and what they mean. It’ll come in handy more often than you think!
We hope this article has helped you understand what some of the more common icons on your taskbar mean.
If you have any other questions about taskbar icons, or need computer help of any kind, don’t hesitate to contact us!
Web browsers are your gateway to the internet or World Wide Web. Browsers contain a lot of features that make your online experience more efficient. This includes things like tabs that allow you to open different web pages at the same time, and “bookmarks” or “favorites” that let you save website addresses so that you don’t have to type-in or search for frequently visited websites.
Some of the most popular browsers are Google Chrome, Mozilla Firefox, Microsoft Edge, Apple Safari, and Opera. These browsers have many useful features to help you get things done with ease. While some features of the browsers are known, others are either unknown or under-utilized,
Here, we’ll discuss some of the great features of your browser that you may not be using yet.
Updated 6/27/22 to reflect new Charter/Spectrum speeds
Wireless carrier T-Mobile is expanding their services to include Home Internet in some areas of Reno/Sparks. Assuming you are in their limited service area – should you switch?
Why you may want to switch
If you’re on a budget, at $50/month TMHI is less expensive than most AT&T and Spectrum internet plans.*
TMHI is available in some rural areas that are under-served by AT&T and Spectrum.
If you’re in an area served only by AT&T’s legacy DSL service with speeds less than 6 Mbps, and Charter/Spectrum is not an option.
* Low-income households may qualify for a discount of up to $30/month on internet service from many providers through the Affordable Connectivity Program.
Why you may NOT want to switch
Wireless service speeds are more variable and can be less reliable than other wired providers, particularly during peak times.
If you’re on a bundled package with AT&T, DirecTV or Spectrum and don’t want to change your TV and/or home phone service.
Internet speeds provided by local home internet providers
The chart below shows a comparison of the speeds provided by the major internet providers. Streaming video needs the most bandwidth (higher speeds), but that number only needs to be as high as 25 Mbps for streaming the highest-quality 4K Ultra HD content.
INTERNET PROVIDER
TYPICAL INTERNET SPEEDS – Download Mbps / (Upload Mbps)
The internet is a huge part of our daily lives. Whether you’re communicating with family over Zoom, checking what your friends are up to on Facebook or buying your weekly groceries, you no doubt use an Internet browser most days of the week – either on your computer, tablet or smartphone.
Internet browsers have a host of cool tricks and functions that make the browsing experience more pleasurable and straightforward. To make the most of these features, you need to understand what they are and how they work.
One such feature is the use of multiple browsing tabs. Tabs enable you to open multiple websites in one browser, without cluttering your desktop with too many browser pages. Being able to use tabs can enhance your browsing experience and make using the internet much easier.
Every leading browser has options for tabbed browsing – even smartphones and tablets.
Tabs are hugely popular – and have a great range of benefits. It’s estimated that the average person has between 2 -3 tabs open at any one point.
Of course, to take advantage of tabs, you need to know how to use them. So, below, we’ll dive into what browser tabs are, why you should use them and how to get started.
What’s a Browser Tab?
With multiple browser tabs open, you can have multiple websites open at the same time within one browser. Each open website will appear as a “tab” at the top of your browser window. You can use your mouse, keyboard-shortcut or finger to switch between your open tabs/websites.
Why is Using Multiple Tabs Beneficial?
Have you ever signed into a website and then been asked to check your email for a verification code, which you’ll need to enter on that page.
In this instance, you may have wondered if there’s a way to check your email without losing the page you’re on. This is where browser tabs come in.
With multiple tabs, you can keep your current page while opening a new tab to check your email.
Other use cases for browser tabs include:
When you are writing an email and want to look up a synonym of a word
When you have two email accounts and want to switch between the two
When you’re reviewing your stock portfolio and want to research information about a company without exiting your account
When you’re researching airline flights and are comparing providers for the best deals
When you’re multi-tasking – reading the news, ordering groceries etc.
When you want to click a link on a page without losing the webpage you’re on
How to Open a New Tab
It’s straightforward to open a new browser tab. In your browser, click the new tab or “+” button that appears in the top right-hand corner of your browser’s toolbar.
When you click this button, you will open a new tab. The new tab will either show as your browser’s homepage or a blank page, depending on the settings you have configured for your browser.
How to Open Links in New Tabs
If you want to open a link on a website into a new tab, right-click the link with your mouse and select the option that says “open link in new tab.”
There’s also a way to do this via your keyboard. You can press and hold the Ctrl key down, then click on the link with your mouse, and a new tab will automatically.
If you’re conducting research online or doing some reading, opening links in new tabs is a great skill to have! For example, if you’re reading our blog and see a link that you like, you don’t have to lose the page you’re on.
Instead, by opening a link in a new tab, you can keep your current page while opening a new one too! In fact, why not click the ‘blog’ link above right now and test it out!
How to Close Different Tabs
One thing to be aware of is that, if you don’t close down tabs once you’re finished with them, you could end up with a huge string of tabs – which will feel overwhelming!
Moreover, having too many tabs open can make your browser feel cluttered and tricky to navigate.
So, make sure you close down your tabs once you’re finished with them. Doing this is simple. You can close the tab by clicking the little “x” icon on the right side of the tab.
Need help getting around your internet browser or other software?
Computer Techs provides expert IT training to Reno area residents on a wide variety of computer and software topics.
If you’d like to learn more about improving your online browsing experience, we can help. Contact us today with any questions or computer needs.
Updated 10/18/23 to include other accounts besides email.
You may have signed up for your email account long ago – before additional account recovery information was required. If you get locked out of your email account tomorrow, does your account have enough account recovery information to allow you to easily reset your password and get back into your account?
Account recovery information includes other methods to confirm your identity including:
A mobile phone number that can receive a text message
A secondary email address
Account security questions – i.e. “your first pet’s name”
This year we’ve had several clients get permanently locked out of their AT&T/Yahoo email and other accounts because there wasn’t enough secondary verifiable information to convince the customer support representative to reset the password. Don’t let that happen to you. Log into your email account today – before a hacker does – to update your profile information with a cell phone number that can receive one-time-password verification text messages. Alternatively or additionally you could provide a secondary email address or setup account security questions/answers. If available, setup 2-Step Verification – sometimes called Multi-Factor Authentication – for even better protection.
Don’t forget to secure your other accounts
While you’re securing your email account, we also recommend securing your other accounts that could be accessed by hackers. Those accounts include:
Bank and brokerage accounts where funds could be transferred out by a scammer
Social media accounts where someone could take over your identity to scam your friends and family
Your Microsoft, Apple and/or Google accounts which are used to login to your computer or mobile device
To secure your accounts as mentioned above, once logged into one of your online accounts, look for a section called profile or security to make the changes and additions. Instructions for some common accounts include:
Have you ever looked at a product on an e-commerce website and noticed that, later, an advertisement appears for that same product on another website?
This is the work of advertising ‘cookies’ and other tracking tools, which monitor your online browsing activities to present you with relevant, targeted advertisements.
This can be a great thing. Targeted advertisements can help you to discover new products and makes the browsing experience feel more personalized.
In line with this, 71% of consumers prefer ads to be targeted to their interests and shopping habits, and 3 out of 4 consumers prefer fewer, but more personalized ads.
However, while some people enjoy targeted advertisements, many also feel like their online privacy is being invaded. A different research study found that 79% of Americans on the web worry about companies infringing their online privacy.
It’s easy to see why. Personal ads can make you feel a little like you’re living in the world of ‘big brother’. Not everyone wants to be monitored 24/7 – and that’s ok.
Moreover, let’s say you are researching birthday gifts to buy for your partner. Targeted ads mean that your partner could end up seeing an ad about the proposed gift – which would ruin the surprise!
As people have become more aware of their online privacy, the leading web browser players have released private browsing options.
Below, we’ll explore how private browsing sessions work – and how you can set one up on your computer.
What is a Private Browsing Session?
A private browsing session is a feature available in most popular web browsers. When you switch on private browsing mode, your browser creates a one-time, isolated session that is kept separate from your main browser.
While your main browser collects your browsing history and data, the private browser essentially only has a short-term memory. It won’t save any of the data about the websites you visit or things you buy. Once you finish the session, the data is gone for good.
Going back to the birthday use case, you can see why private browsing is useful! It ensures that no one else who uses your computer can see what you’ve been looking at online.
When Did Private Browsing Mode Begin?
Apple was the first manufacturer to release a private browsing mode. In 2008, it launched a ‘private browsing’ feature. Following this launch, the private browsing mode grew in popularity, leading to other big players like Microsoft and Google launching similar features.
How To Start a Private Browsing Session
It’s simple to get started with a private browsing session. Here’s how to launch it on each of the most popular web browsers.
Google Chrome: Launch Google Chrome as you would normally. Then, near the top right hand of the screen, click the 3-dot menu “Customize and control Goole Chrome”. You’ll see an option that says “New Incognito Window” click this to launch private browsing mode. Then, browse the web as you normally would.
Safari: Open Safari as you would normally. In the top left hand of the screen, click the “File” button. Then click the option to open a “new private window”. This will take you to private browsing mode.
Microsoft Edge: Launch your Edge browser, then click on the three dots button in the top-right corner. Then, click on “New InPrivate window” to open a browser in private mode.
Firefox: Open Firefox, click the 3-dash menu button near the upper-right, then click New Private Window.
The Benefits of Private Mode
If you’re concerned about your online privacy, then private browsing is a great way to reduce your worries. Private browsing is convenient for:
Not having cookies saved from the websites that you visit, so that you won’t get related adverts later on
If you’re using someone else’s computer to login to your email or financial institution, your browsing history is not saved
Avoiding rising prices on items by viewing the same item repeatedly
If you want to feel more in control over your data and online privacy, private browsing mode is definitely a great option.
Get Help Improving Your Online Safety & Privacy
Computer Techs enjoys working with Reno area residents to help them get more from their technology while also keeping their personal data secure. We can help keep you better protected online.
The next time you’re browsing on your computer, and you see a quiz on Facebook or another social media site that looks appealing, think before you click.
With the political season back upon us, you need to be aware of how the data you share in these quizzes might be used.
You might not think that a quiz about your favorite foods or personality type will be beneficial to political parties but, these days, you never know. Any data you share could ultimately be used for political profiling.
What is political profiling?
Profiling is a method of analyzing individuals’ data to classify them into groups or sectors. Political parties have used profiling techniques for decades, but it has entered a new realm in light of the internet.
With tools like artificial intelligence and data analytics, political parties can create detailed profiles about individuals and groups, which could even be used to unethically manipulate their political choices through fake news and social media advertisements.
In this event, Cambridge Analytica collected the data of millions of people via an app called This Is Your Digital Life. The app was an online survey that asked users questions about their political preferences and personality traits. All of the answers given in this quiz were then used for data analysis during the 2016 presidential election campaign.
As a side note, if you’re worried about third parties having access to your data, contact us. We can help you improve your online data privacy and reduce unwanted advertisements.
How do political parties use profiling?
Profiling is used as the basis for targeted online content that is aimed at specific, tailored audiences. With Facebook ads, political parties can create highly personalized content and choose who to share it with, so they know it will have the most impact.
Unfortunately, because Facebook and other social media sites allow such targeted ads, this means that end users don’t get a complete or fair picture of the political sphere. You may only see specific messages over and over again, which can lead to misinformation and swing votes unfairly.
What should I do to avoid being profiled?
Aside from avoiding online surveys, you can do a few things to help prevent the spread of misinformation during the political season. You might think that these ads won’t target you, but older citizens are actually a prime demographic for political parties.
To ensure fair political outcomes, it’s important to educate yourself on the spread of false information. While players like Facebook and Twitter are working to stop the spread of fake news, you also need to do your own due diligence.
Always fact check before sharing a post on social media. This will make sure that you only spread accurate, legitimate news and stories.
Check the source of the news or story before your share. Mainstream news is the best source you can rely on. Information shared by a friend or relative – unless it is a first person account – is not always reliable, as you don’t know where they might have shared the story from.
Look out for what the story is trying to prove or disprove. Often, fake news stories will have a clear agenda, such as discrediting a person or group of people. If a story is hammering into one person or group, there may be bias motivations behind it. You should also be wary of stories from a specific political party or candidate, as they have a clear agenda to show themselves in a better light and discredit their opponents.
Watch out for highly emotive stories. While some news stories may make you feel sad or shocked, some fake news pieces are designed to elicit an emotive response. By making you feel something, fraudsters are hoping you will react quickly – without thinking it through.
Be aware of your own confirmation bias. If you see a story that aligns with your views and emotions, you’re more likely to believe it. This phenomenon is known as confirmation bias. In line with this, people over 65 were more likely to share false or misleading content on Facebook during the 2016 presidential campaign. If your data is being used for profiling, you’ll likely see many stories like this. Just by being aware of profiling and confirmation bias, you can prevent the spread of misinformation.
Improve your online privacy today!
If you want support with improving your online privacy and data protection, reach out to us.
QR is an acronym for quick response – which makes sense as QR codes respond very quickly to requests to use them. Essentially, a QR code is a square-shaped barcode that you can scan with your mobile phone to load a website or application. QR codes can also be used to load phone numbers, login pages, and Wi-Fi details.
QR codes have their origin in the business world. They were invented to help improve the speed of supply chain processes. Over the last few years, though, QR codes have firmly entered the consumer world. Most recently, QR codes have become an essential part of the pandemic response, helping to facilitate ‘contactless’ services.
You may have been to a restaurant and noted a QR code sticker on your table. Your server may have asked you to use the QR code to load the menu instead of receiving a paper one. Similarly, QR codes have also been used for contact tracing to help keep track of COVID-19.
While QR codes are really useful, they can seem daunting if you don’t know how to use them. In fact, a YouGov study found 14% of Americans find QR codes to be challenging to use, with adults over the age of 65+ especially are likely to say so (20%).
Below, we’ll explain how to use QR codes. We’ll also help you to understand which QR codes are safe to use – and which you should be wary of.
How do I use a QR code?
Most mobile phones that have cameras have QR scanner capabilities. If you have an older mobile phone, your camera might not come with this capability. In this case, you should be able to download a QR scanning app from the Apple Store or Google Play. If you’d like assistance with this, let us know, and we can help.
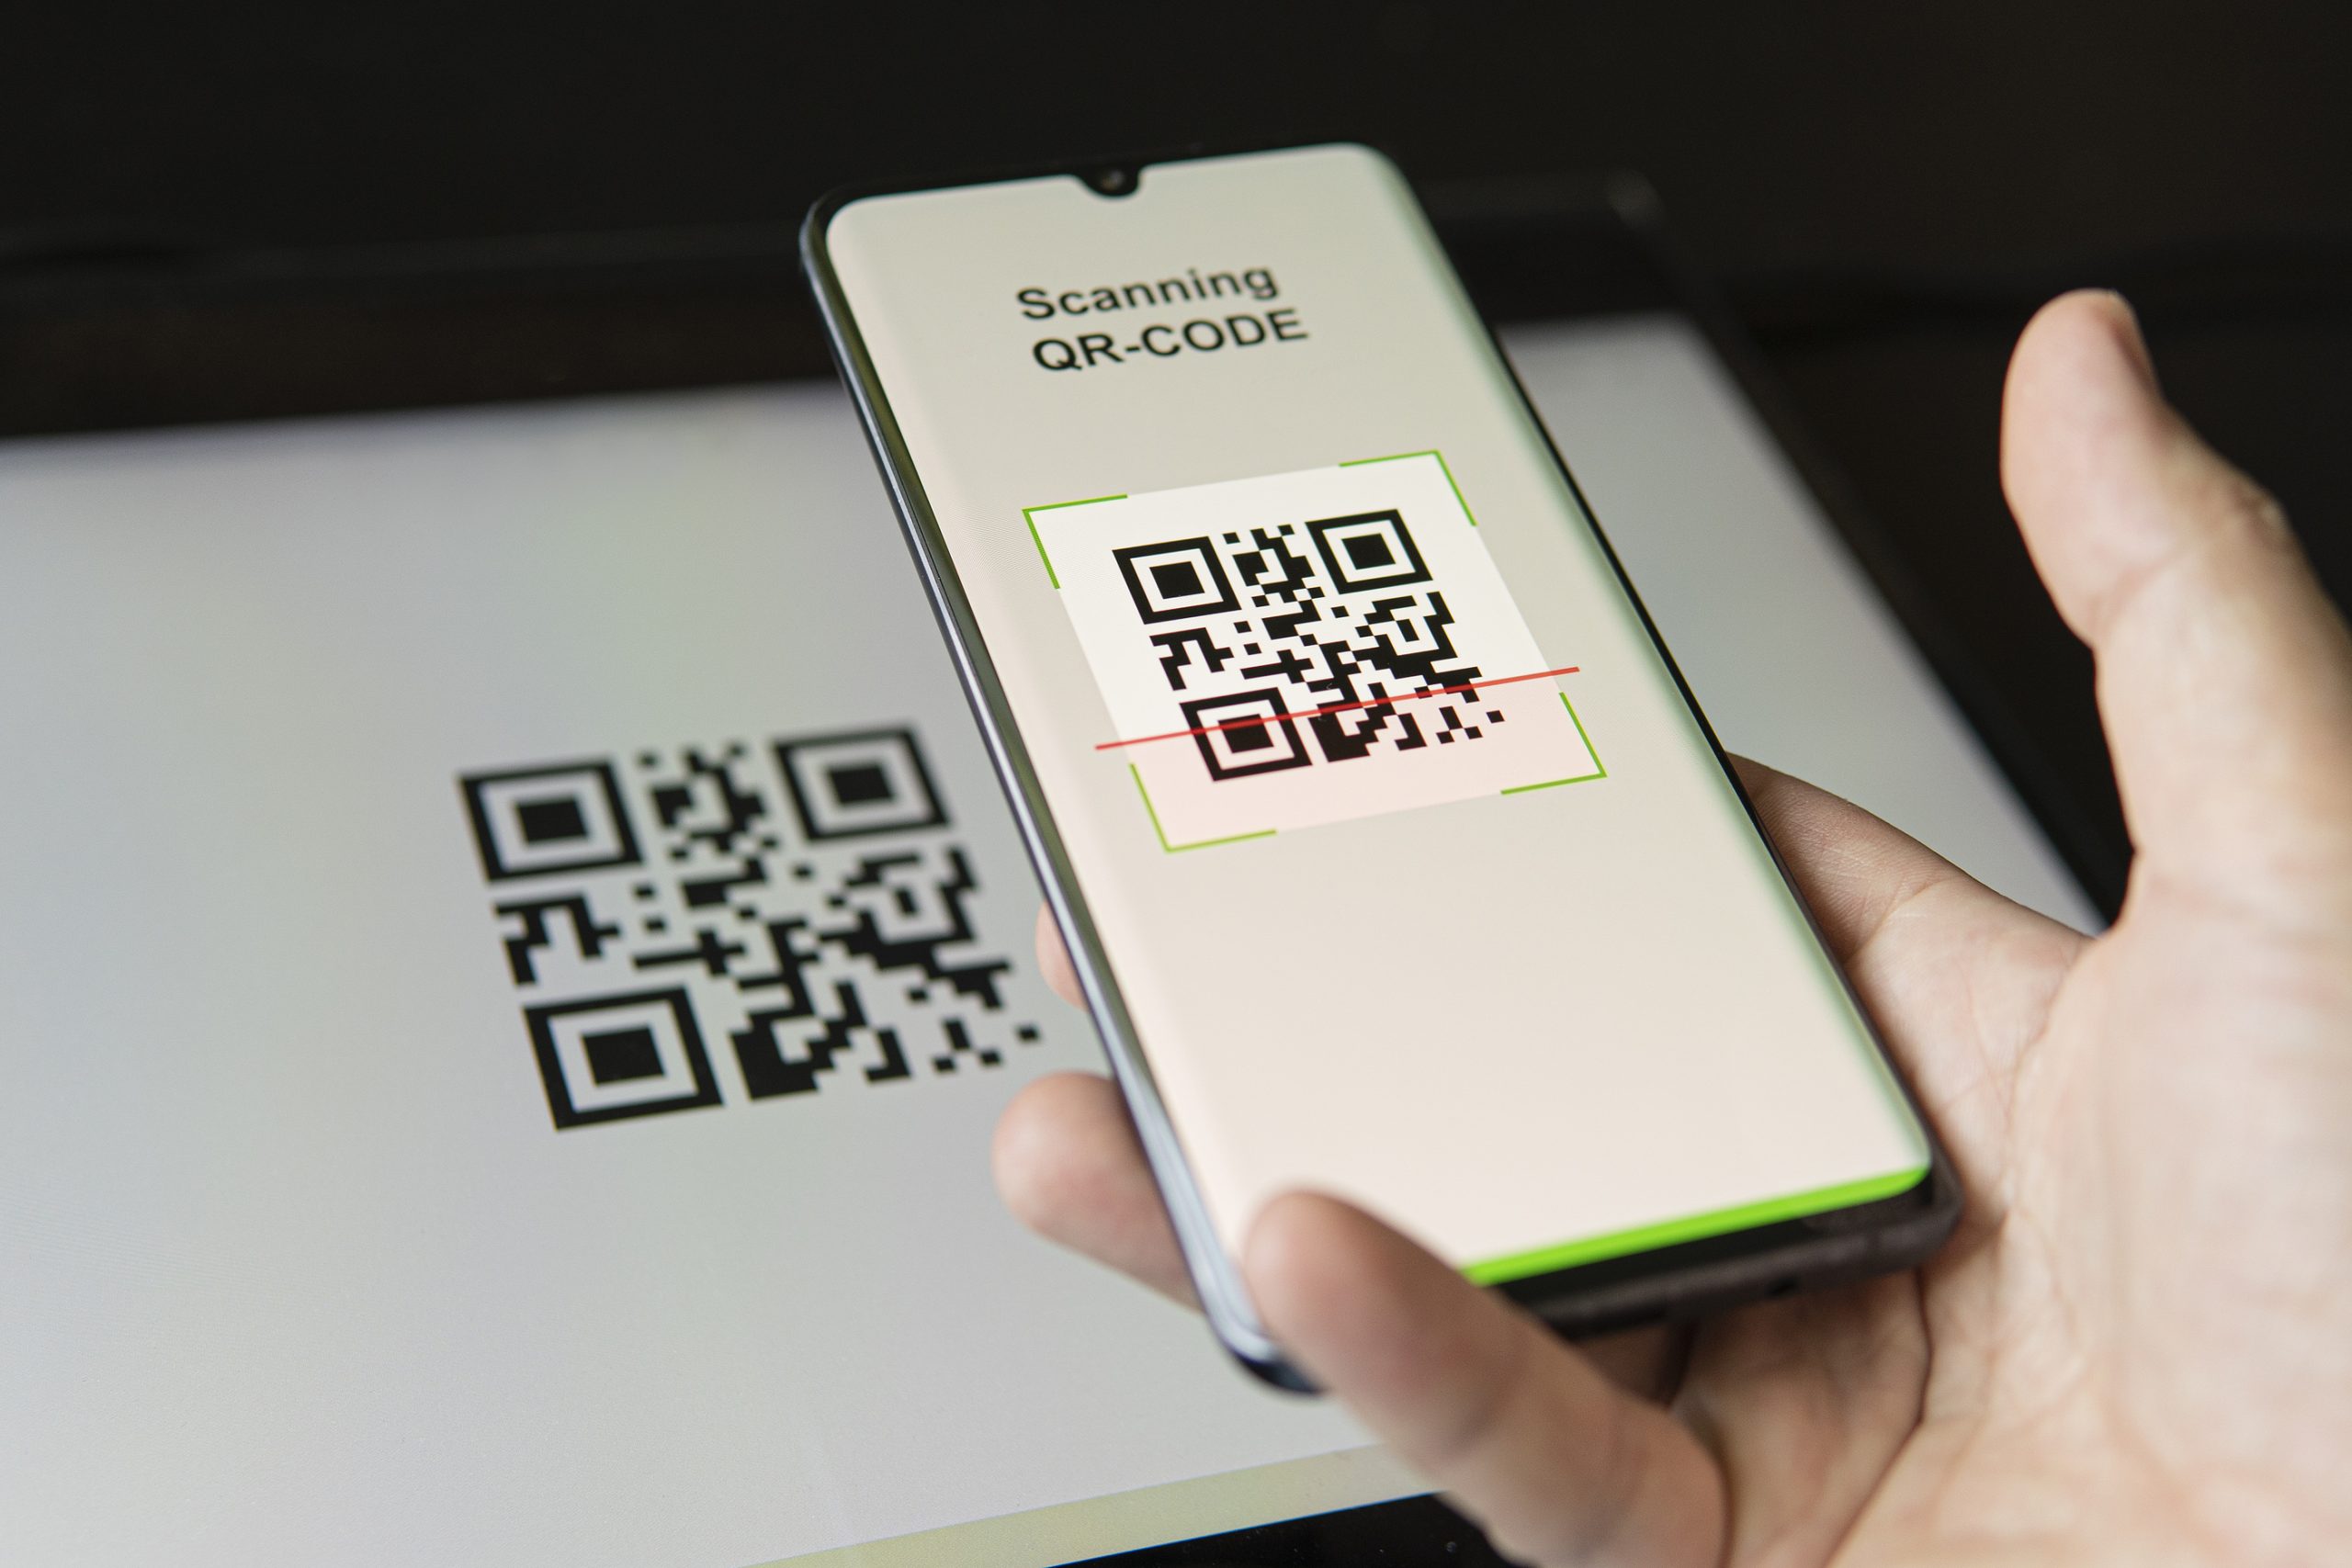
Once that’s done, it takes just a few simple steps to scan a QR code.
Open the QR application or the camera on your phone.
Point your camera at the QR code – DO NOT press the shutter button to take a picture. Line up your camera so that all four corners of the code are in view.
Click the link that’s presented.
Your phone will now do the work for you! It should automatically take you to the website, application or data attached to the QR code.
Are QR codes safe?
Legitimate QR codes are safe to use. You need to be wary, though, of fraudulent QR codes that are made by cybercriminals. These codes look like legitimate QR codes but have dangerous consequences.
A malicious QR code might:
Install malware onto your phone
Take you to a malicious website that asks you to hand over personal details or financial information
Make your device join a suspicious Wi-Fi network that allows attackers to see and steal your data
Because we can’t read QR codes, it’s very easy to fall for a QR code scam. Plus, as these codes are increasingly popular, hackers are betting on the fact that people won’t suspect anything untoward.
Most recently, the FBI has warned of a scam in Texas, where hackers have been placing fraudulent QR codes near parking meters in Austin. Many civilians have scanned the codes to pay for parking, but the codes actually lead to a fake payment website. Not only are people getting parking tickets, but they’re paying hackers! It’s unknown whether the hackers are also stealing the credit card information given on the fake website – but it’s very possible!
This type of attack will become increasingly common. We’ll see more and more hackers print malicious QR codes and place them in public in order to trick people.
Don’t fall victim to a QR code scam!
This kind of scam shouldn’t put you off using QR codes entirely. You just need to be careful about the ones that you use.
We recommend being wary of all codes posted in public places. Make sure to inspect the code before scanning. It’s also helpful to look at the URL of the QR code if you have scanned it. Legitimate URLs are easy to spot, such as https://computertechsreno.com/ Look at the grammar, punctuation and spelling on the website to make sure it appears legitimate – particularly if the website is asking for payment details.
Malicious URLs tend to have spelling mistakes and are suspiciously long.
If you’re still unsure, don’t scan the QR code. We advise avoiding scanning all codes attached to street poles – as these can’t be trusted.
Generally speaking, QR codes on restaurant tables and in shops can mostly be trusted – but always check with a member of staff if you’re not sure. You can scan QR codes from sources you trust, like on TV, on popular websites, or a trusted person’s business card.
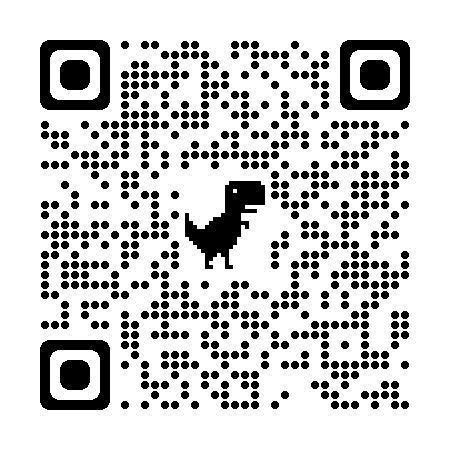
If you’re not sure about a QR code, don’t hesitate to get in touch with us. We can help you to protect your mobile phone. If you’d like assistance, contact your tech, or scan the following QR code with your smartphone:
Scan the QR Code above from your smartphone to have it take you to https://computertechsreno.com/contact/
We’ve been receiving lots of reports from clients that their Facebook account has been hacked. In reality, usually it’s just been cloned. Here’s what’s happening.
If you have a Facebook account, by default your Friends list is set to “Public” – meaning anybody on the internet can see who your Facebook friends are. But miscreants and scammers can use this information along with other public information to impersonate you by creating a new Facebook profile – even with your public profile picture(s). Then they send friend requests to all of your friends. Once your friends become friends with the new “you”, a scammer can persuade your friends that your original Facebook account was hacked and your friends are lead to believe the new account is really you. Scammers will then use your new Facebook profile controlled by them to have your friends confide in “you” to obtain personal/private information and/or gift cards or other financial scams.
What you need to change right away
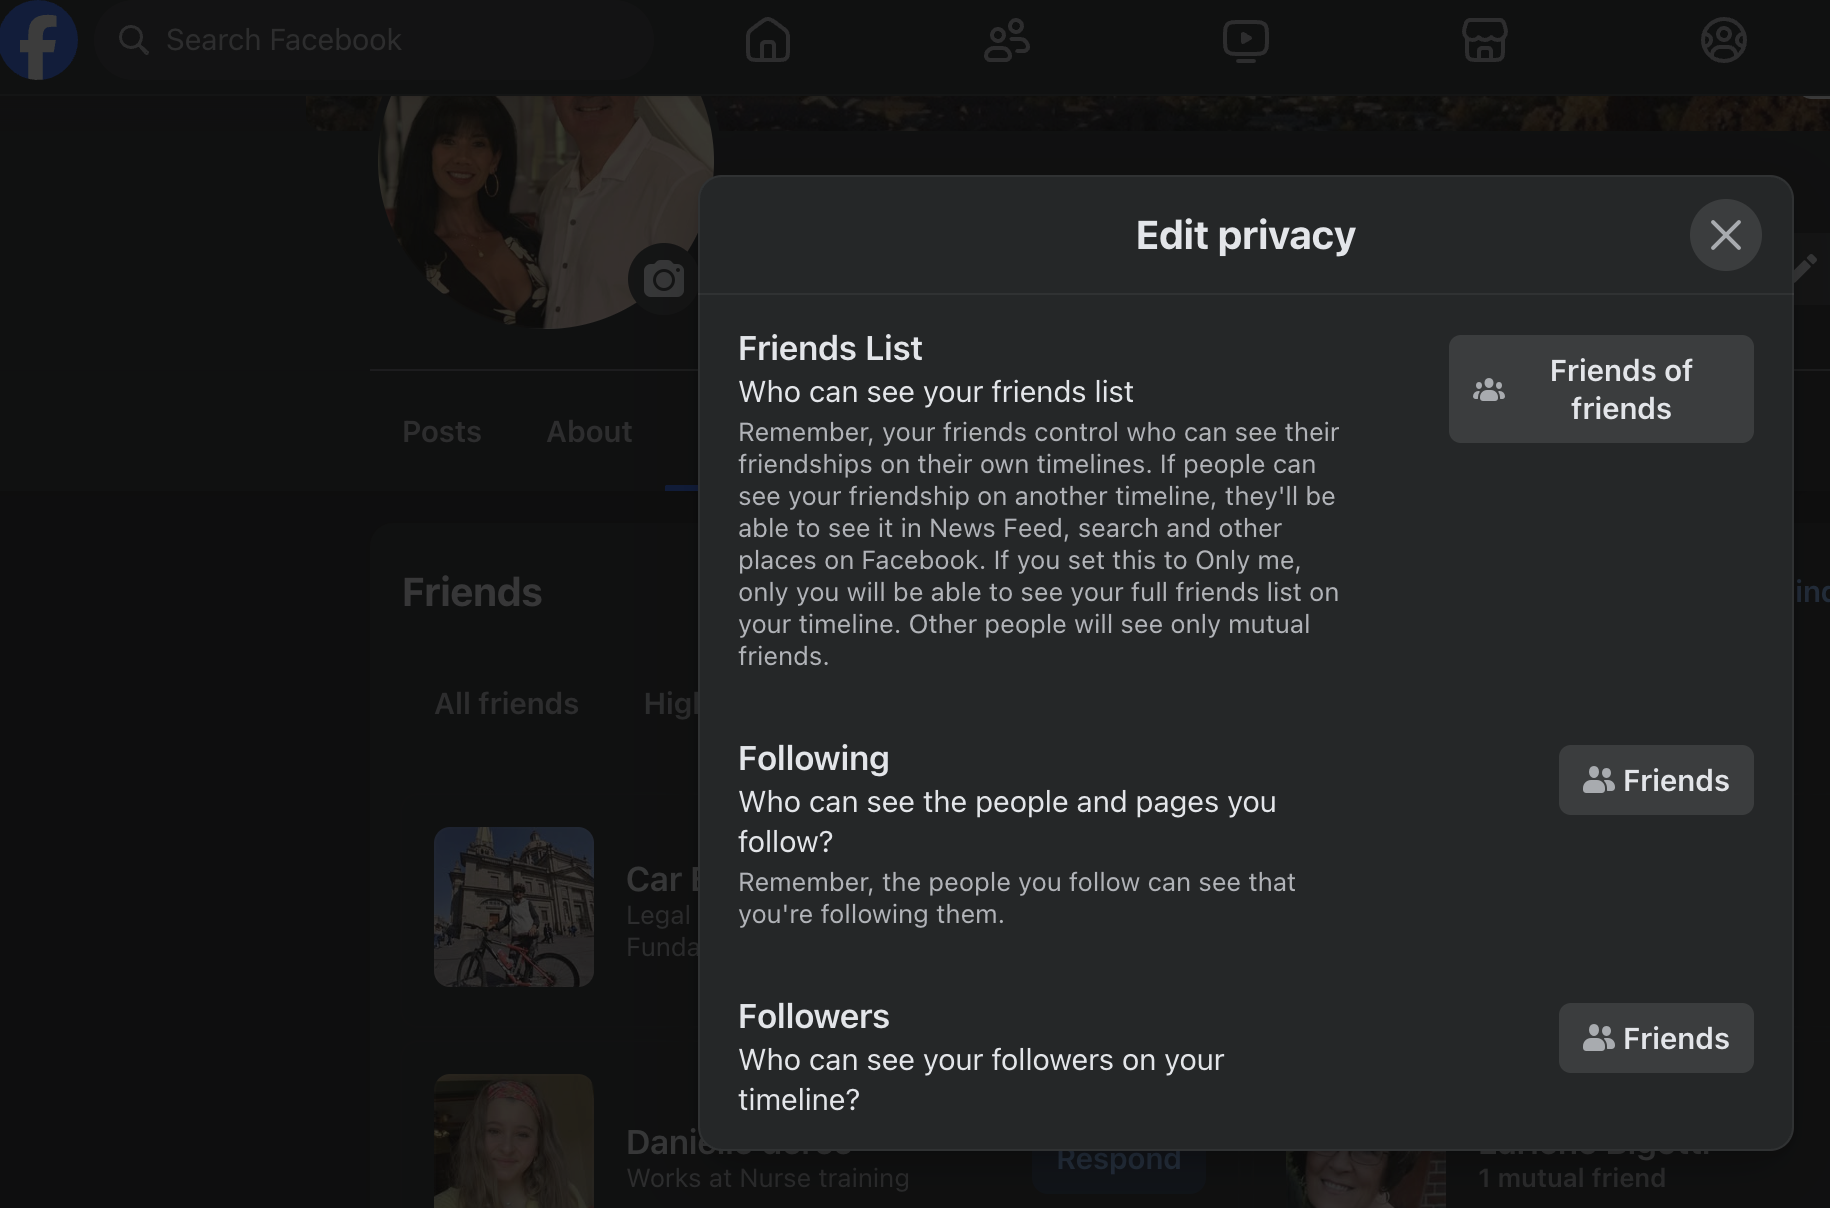
We recommend using Facebook’s Privacy Checkup to review your settings, and make sure that scammers can’t use public information from your Facebook account. In Facebook, go to your Account > Settings and Privacy > Privacy Checkup. In “Who can see what you share”, make sure “Who can see your friends list on your profile?” is NOT set to Public. In Privacy Checkup we also recommend going through “How to keep your account secure”, and make sure that you’re using a unique password for Facebook.
An additional step is to make sure that your only “Friends” can see your Followers – it’s set to “Public” by default. Check this setting by click the 3 dots near the top of your Friends list > Edit Privacy > Followers.